-
£122.00
inc VAT
Model: cpdsmodel
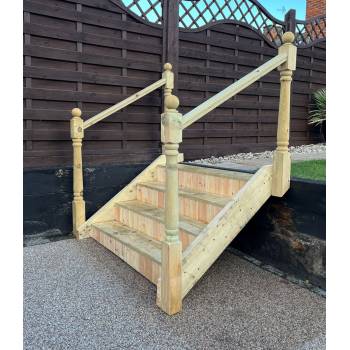
Bespoke Closed Plan Garden Decking Steps : 2 to 12 treads
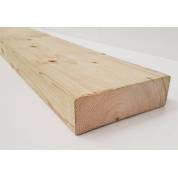
We manufacture made to measure decking steps on our premises. They are suitable for any external use, e.g., decking areas, hot tubs, patios or caravans etc.. The treads and strings are made from pre-treated 9x2" timbers which makes them extremely sturdy. The strings are properly trenched out to form grooves to receive the treads. As the strings are trenched as apposed to being cut out, they retain a lot of the strength given by the 9x2" timber. It is important to have each step the same rise height so as not to cause trips which we achieve by making the overall rise of the steps a multiple of the individual rise heights of each tread. Most other decking steps do not offer this feature. The prices quoted are for a overall width of 959mm. If you need a different width please message us for a price. This item is supplied in component form. The string ends need to be cut by yourself. The risers are closed in by using individual matchboards slotted together. This matchboard has a cover of 89mm x 14mm thick and is pre-clear preserver treated.
Features and options:-
- Supplied in loose components for you to cut and assemble. See pictures, diagrams. The strings, riser timbers and treads are supplied only.
- There are no newels, handrail or spindles supplied. Photos are for illustration only.
- Option 'A' or 'B'? Option 'B' makes the last step level with the upper floor level. Option 'A' has a nosing that is level with upper floor and the last tread is a full riser height below the nosing. See diagram in attached pictures.
- Wooden decking steps, made from very sturdy 220x47mm treated timbers for the strings and treads.
- The stair strings are left as a longer length, you will need to cut the mitres/ends yourself to your ground and upper levels.
- Only the timber is supplied, you will need to get your own glue and fixings.
- For the timbers to last longer it is recommend that you seal all ends and cut outs with an appropriate end sealer.
- We can bespoke make this item to any size on request, with any number of treads and height, and to any width. Please email for a cost if you require this.
- Please note these decking steps don't comply to building regulations as an internal staircase.
- We can manufacture to any width.
- You can angle the bottom riser timbers to suit a floor that isn't level.
As long as you are not using these steps to form part of a dwelling or main access to a dwelling then we don't need to consider building regulations so we are free to manufacture them to whatever we see fit. That being said, we like to adhere to the building regulations as much as we can. So to keep the steps at a maximum of 42 degrees pitch we don't recommend making the riser height any greater than 200mm. So, the formulae for the maximum vertical floor to floor height you can have for a given number of treads is (number of treads + 1) x 200mm for option 'A' and for option 'B' its 'number of treads' x 200mm, e.g, if you had a floor to floor vertical height of 750mm you would need 3 treads for option 'A' which would give a riser height of 188mm which is well under the recommended 200mm.
What we need to know from you:-
Please message us with the following information.
- Overall vertical height, i.e., floor to floor.
- Overall width.
- Whether you want option 'A' or 'B'. See pictured diagram.
Installation instructions.
We supply 4no. x 80mm x M5 woodscrews per
tread.
- You will need a saw, adjustable bevel, square, pencil, sandpaper, claw hammer, cordless screwdriver.
- Lightly, sand all the rough edges so they are free of spelching.
- Cut the bottom end of the strings so they create equal heights of rise between each tread using an adjustable bevel and square to mark out with a pencil. See diagrams.
- Cut the top end of the strings so the nosing or top tread butts up to the upper floor. A nosing is just a narrow tread.
- End seal any end grain on the end of the treads and in the string trenches and ends.
- Slide the Treads into the pair of strings with the bigger rounded edges, on the treads, to the back.
- Screw 2 screws through the strings into each end of each tread. Each screw is to be positioned in the middle of each tread and 20mm from the edge.
- The riser cladding pieces will need to be nailed into place. We recommend 30mm galvanised oval nails. They are pre-cut to length and they slot together. You will need to cut the last matchboard piece to the appropriate width so it fits. Before nailing each matchboard you will need to pilot hole the risers so the timber doesn't split while nailing.
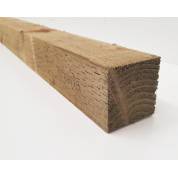
- A piece of 3x2t timber is supplied to carry the bottom tread matchboard risers. This timber will need to be fastened to the strings.
- The bottom riser cladding pieces will be shorter than the rest.


